How to Replace a Solar Street Light Battery
Apr 26, 2022
Read:1162
A solar street light that switches off early does not necessarily need a new battery. Poor charging, damaged wiring or an incorrect controller setting can cause similar symptoms. Before ordering a replacement, have a qualified technician check the system and confirm the fault.
This guide explains what contractors, distributors and maintenance teams should confirm when replacing a solar street light battery: the existing configuration, replacement compatibility, service access and checks after installation. It is not a substitute for the service instructions for the specific light.

1. Check Whether the Battery Actually Needs Replacing
Shorter lighting hours, repeated low-battery shutdowns or a light that no longer runs through its scheduled night are reasons to investigate. They are not enough on their own to identify a failed battery.
Ask the technician to check whether the panel is shaded or dirty, whether the controller records a charging fault, and whether cables and connectors are damaged. A recent change to the lighting schedule can also increase nightly energy use. Replacing the battery without resolving the cause may leave the same problem in place.
Battery condition should be assessed using the manufacturer's diagnostic procedure. A voltage reading alone may not establish usable capacity, particularly with lithium batteries. For the wider maintenance picture, see our solar street light lifespan guide.
Safety: If a battery is swollen, leaking, unusually hot or physically damaged, stop using the equipment and arrange professional assessment. Do not open a sealed battery, add acid, bypass its protection system or try an unspecified charging method to restore it.
Battery manufacturers also stress that maintenance depends on the battery type and the complete system. General guidance should not replace the applicable product manual; see Trojan's battery maintenance guidance for an example of how maintenance requirements differ between battery types.
2. Identify the Existing Battery and Lighting System
Start with the light's model number, serial number and original specification. Where the battery label is safely accessible, record its chemistry, nominal voltage, capacity, part number and manufacturer. Send photographs to the supplier if the information is incomplete; do not guess from the housing or connector colour.
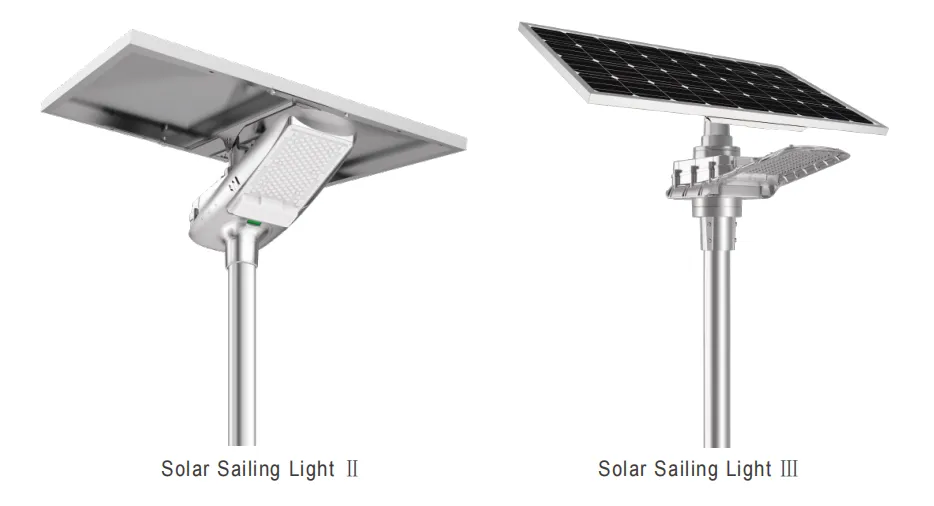
Battery access differs between products. A split system may use a separate enclosure, while an all-in-one light may have the battery inside the fixture. Pole-mounted and other arrangements need their own access plan. Neither the battery location nor the dismantling procedure should be assumed from the product category alone.
Capacity also needs context. Amp-hours (Ah) without nominal voltage do not describe stored energy, and two packs with the same Ah rating may not be interchangeable. Pole height alone cannot determine the required battery capacity.
3. Check Replacement Battery Compatibility
The safest starting point is the original approved replacement part. If it is unavailable, ask the manufacturer or a qualified system specialist to confirm an alternative in writing. Matching the advertised capacity is only one part of that assessment.
| Item to Confirm | What the Maintenance Team Needs to Check |
| Battery chemistry | The controller's charging program and protection settings suit the proposed battery type. |
| Voltage range | Nominal voltage and the actual charge and discharge limits are compatible with the system. |
| Usable energy | Capacity supports the agreed lighting schedule and backup requirement, considering discharge limits and site conditions. |
| Battery protection | Where a battery management system (BMS) is used, its limits, current ratings and any communication requirements suit the light. |
| Dimensions and mounting | The pack fits securely without damaging insulation, obstructing service access or compromising the enclosure seal. |
| Electrical connections | Connector pinout, polarity, cable rating, fusing and waterproof interfaces match the approved configuration. |
| Temperature limits | Permitted charging, discharging and storage temperatures cover the intended installation conditions. |
| Charging capacity | The panel and controller can charge the replacement pack adequately under the site's design conditions. |
A larger battery is not automatically an upgrade. It may not fit the enclosure, and additional capacity does not correct an undersized panel or persistent shading. Any change should be checked against the whole system rather than approved as a battery-only purchase.
4. Plan the Replacement Around the Model's Service Instructions
Work at height and battery servicing should be handled by qualified personnel using suitable access equipment. Before work begins, confirm the warranty position, replacement approval and the manufacturer's procedure for making the system safe. Solar panels can generate electricity in daylight, and a battery can still supply fault current when the lamp is off.
The disconnection and reconnection sequence depends on the controller and product design. Do not use one generic sequence for every solar street light. Follow the model's service documentation, keeping the battery pack sealed and protecting connections against short circuits.
The service inspection should also cover cable damage, corrosion, water ingress, mounting hardware and enclosure seals. Replacing a pack while leaving a damaged cable gland or seal unresolved can expose the new battery to the same conditions that caused the original fault.
For broader installation considerations, refer to our solar street light installation guide. Its general guidance does not replace the product-specific wiring or servicing instructions.
5. Test Charging and Nighttime Operation After Replacement
A successful switch-on is only an initial check. The maintenance team should verify charging behaviour, controller indications and any fault codes using the approved test procedure. Confirm that the correct lighting schedule, dimming profile and sensor settings remain in place.
Check nighttime operation against the agreed duty and record the conditions during the observation period. One night's operation does not establish multi-night backup performance. If the battery still receives insufficient charge, investigate the panel, wiring, controller and site conditions rather than repeatedly replacing packs.
Close the maintenance record with the installed part number, serial or batch details where available, service date, settings and test results. Arrange collection through an authorised battery recycling service in accordance with local requirements; do not place the removed battery in general waste. Damaged batteries may need specialist handling and transport arrangements.
Can a Gel Battery Be Replaced with LiFePO4?
Sometimes, but it is a system conversion rather than a direct swap based on matching Ah. Gel lead-acid and lithium iron phosphate batteries have different charging and protection requirements. Similar nominal voltage does not prove that the existing controller settings are suitable.
A proposed conversion needs confirmation of the controller, charging profile, voltage limits, battery protection, enclosure, wiring and environmental suitability. Depending on the original design, other parts may need changing. Obtain an approved configuration before ordering; do not apply lead-acid repair or equalisation routines to a lithium pack.
What to Provide When Ordering Replacement Batteries
For a maintenance order, gather the following information before requesting a quote:
- Light model, approximate installation date and any serial-number records.
- Battery and controller label photographs taken by the service team.
- Original specifications, fault symptoms and diagnostic results.
- Battery dimensions, mounting arrangement and connector details, if safely accessible.
- Installation location, lighting schedule, quantity and required delivery date.
If the site contains different models or production revisions, separate them in the enquiry rather than assuming every light uses the same pack. Ask the supplier to identify the compatible part, any required setting changes, warranty terms and availability before placing the order.
For RoadSmart equipment, send the model details and battery label photographs to our team for compatibility review. Replacement availability and any required changes must be confirmed for the specific model.